hear what the community is talking about

Community Blogs

We’ve gathered blog posts from across the internet to highlight the many voices that make up our community. Powered by Umbraco, this space brings together diverse stories, ideas, and perspectives in one easy‑to‑explore hub. Dive in and discover what the community is creating, sharing, and talking about.

Umbraco

Auto-Updating Your GitHub README with Your Latest Blog Posts

by Owain Williams

Securing Umbraco Images with HMAC

Learn how to protect your Umbraco images from abuse by implementing HMAC authentication for image crop requests, and how to generate HMAC signatures in Next.js when using the Content Delivery API.

by Nathaniel Nunes

The Umbracian's Guide to Bristol (2026)

Are you heading to Umbraco Spark and hoping to explore Bristol while you're here? I live near Bristol and now consider myself a Spark veteran, so thought I'd share my insights!

by Joe Glombek

Running GitHub Actions .NET and Azure workflows locally with Act

Act is a fantastic tool for testing GitHub actions locally instead of pushing that 10th commit in a row called Testing GitHub Actions (again) but configuring it to work correctly can be a balancing act, so here are some tips for getting Act working with your .NET CI/CD flows.

by Joe Glombek

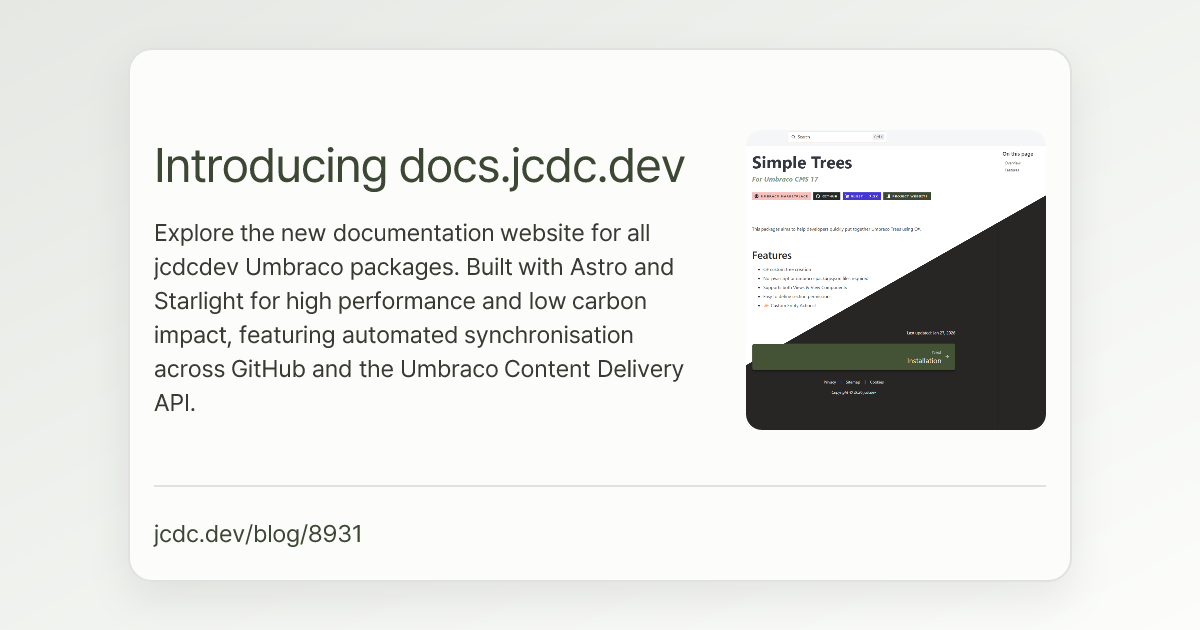
Introducing docs.jcdc.dev

Explore the new documentation website for all jcdcdev Umbraco packages. Built with Astro and Starlight for high performance and low carbon impact, featuring automated synchronisation across GitHub and the Umbraco Content Delivery API.

by James Carter

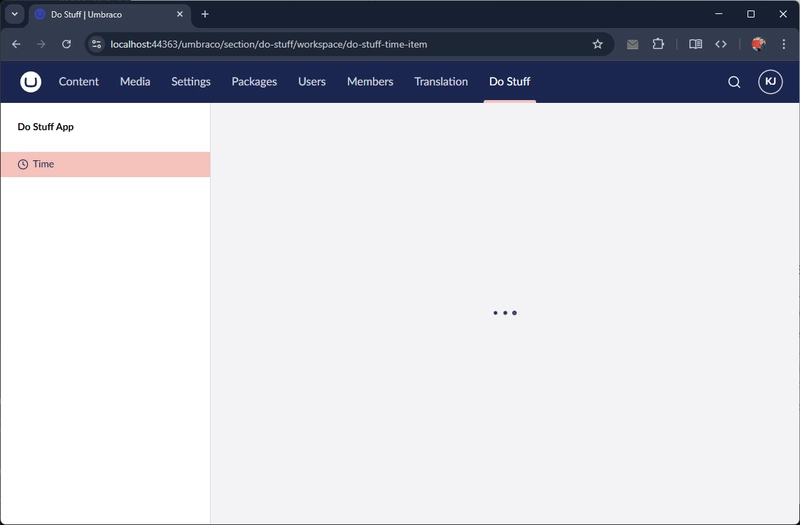
Battle scarred developer's guide to Umbraco v17 -Workspaces

All the code for this series of posts is available in the DoStuffWithUmbraco Repository on GitHub In the last article we got to the point where we had our own custom section, with a side menu (or "sidebarApp") and a basic menu item. but for now clicking on that menu item just shows us some loading dots 😞 What we need to do know is define a workspace. So what are workspaces ? well to lift the description directly from the umbraco docs : Workspaces provide dedicated editing environments for specific entity types in Umbraco. They create isolated areas where users can edit content, media, members, or other entities with specialized interfaces and functionality. basically menu items are assigned an 'entity type' and when you click on them Umbraco looks for the workspace that renders that entity type. entity types are really just Identifiers at this point, usually you might have in two entity types a 'root' and and 'item' - the root is as you might expect the one at the root, and the item is an item in your tree (if you have one. Item workspace For our "simple" time item, we only have a single "do-stuff-time-item" entity type, and that's the one we need to build a workspace for to show information to the user. Workspaces at their most basic have two things, a workspace context and a workspace element. Workspace Context Your workspace context is the code that controls the state and data for your workspace. here you have all your data and ways to fetch and save it. To be clear, you don't need to do this in a context, you can just fetch , store and manipulate data in the element, but as you will see in a bit, that is probably going to lead to duplication and a more complex bunch of code So without being to complicated a workspace will look something like this: export class MySampleWorkspaceContext extends UmbEditableWorkspaceContextBase<TimeSettings> implements UmbSubmittableWorkspaceContext { #settingsRepository = new DoStuffTimeSettingsRepository(this); readonly unique: Observable<string | null | undefined>; public readonly workspaceAlias = DOSTUFF_WORKSPACE_ALIAS; constructor(host: UmbControllerHost) { super(host, DOSTUFF_WORKSPACE_ALIAS); this.provideContext(DOSTUFF_WORKSPACE_CONTEXT, this); } getUnique() { return undefined; } getData() { return this.#timeSettings.value; } getEntityType() { return DOSTUFF_TIME_ITEM_ALIAS; } protected submit() { const settings = this.#timeSettings.value; if (!settings) return; await this.#settingsRepository.saveTimeSettings(settings); } } Workspaces can even be simpler than this, but here we are implementing a UmbSubmittableWorkspaceContext because we want to be able to save things that we update on our context, if you don't want to tie into other things like workspace actions, you don't need to do this, but its a relatively simple implementation, so in my opinion it's worth it. There are few things we are going to pick out in the context : ProvideContext You can see that inside the constructor for the context we are calling this.provideContext . this tells the rest of the app, that we are responsible for the DOSTUFF_WORKSPACE_CONTEXT so if anything wants to interact with this context they can. by asking for it in their own constructor. For example - a view might ask for the context like this. this.consumeContext(DOSTUFF_WORKSPACE_CONTEXT, (context) => { // do stuff with the context here. }); Workspace contexts have a scope, they will only exist while you are in the workspace, you can't call a workspace context from somewhere else or another section - if you need to do that you might need a global context, which work in a similar way they are just defined slightly differently Repositories Another thing you might have noticed about this context is we randomly just call save in a #settingsRepository and we've haven't told you what one of them is yet - we will get to them in a bit. But for now, that's just the place where the actual calls to API end points and the like are stored - it means our context doesn't need to know the inner workings of the API it can just say go get this or save that. Views So now we have registered our workspace and we have a workspace context, you will notice, we still have nothing to show to our user! So now its time to fix that, and present them with something. You define what things show in a workspace via workspaceView elements. again we define these in a manifest. type: "workspaceView", alias: "DoStuff.DefaultWorkspaceView", name: "DoStuff Default Workspace View", js: () => import("./default-workspace-view.element.js"), weight: 500, meta: { label: "#doStuff_defaultWorkspaceViewName", pathname: "default", icon: "icon-alarm-clock", }, conditions: [ { alias: "Umb.Condition.WorkspaceAlias", match: DOSTUFF_WORKSPACE_ALIAS, }, ], }, So the things to note : the js entry points the file that will render the element the meta data defines the name and icon for the view the conditions make sure our view only shows up on our workspace. View element The view element is a UmbLitElement that renders what you want to show the user @customElement("do-stuff-default-workspace-view-element") export class DoStuffDefaultWorkspaceViewElement extends UmbLitElement { override render() { return html`<umb-body-layout> <div class="layout"> <uui-box .headline=${this.localize.term("doStuff_defaultWorkspaceTitle")} > <h1>Hello Time</h1> </uui-box> </div> </umb-body-layout>`; } } With this in place we get something to show the user ! Multiple views, and icons. So we defined that icon, and name, but it's not anywhere on the screen, what's up with that?. Well the icon and name are used when we have multiple views in a workspace. so if we add another workspaceView manifest to the workspace { type: "workspaceView", alias: "DoStuff.SettingsWorkspaceView", name: "DoStuff Settings Workspace View", js: () => import("./settings-workspace-view.element.js"), weight: 200, meta: { label: "#doStuff_settingsWorkspaceViewName", pathname: "settings", icon: "icon-settings", }, conditions: [ { alias: "Umb.Condition.WorkspaceAlias", match: DOSTUFF_WORKSPACE_ALIAS, }, ], }, We get our 'tabs' Summarry This gets us the skeleton of our workspace up and showing something to the user - there is much more to workspaces , and we will go into them in some later posts, but for now, we have a section, a menu and some workspaces. so 🎉

by Kevin Jump

How I used Umbraco.AI for free

by Owain Williams

Umbraco 17 Backoffice Extensions for Beginners: TypeScript + Lit + Vite

by Girish Sasikumar

Umbraco testing examples now also for Umbraco 17

I updated my testing examples repository to the latest Umbraco version. D-Inventor / automated-testing-in-umbraco A working example of integration- and unittests with Umbraco. A demonstration of various concepts for testing your Umbraco website Umbraco 17 automated testing setup This project is a fully functioning setup for automated testing with Umbraco 17. You can use this project as a reference or starting point to get started with testing on your Umbraco website. The tests are set up with Test Driven Development (TDD) in mind. Tools The most important tools that are used in the automated tests are as follows: Name Description xUnit v3 The testing framework. You can use any testing framework that you like though NSubstitute Library for mocking. Any mocking library will work. This project doesn't do extensive mocking, but for example IPublishedValueFallback is a mandatory parameter for any published content item, even if you don't actually use it. It's just convenient to insert a mock. Test Containers Automatically creates docker containers while running tests. It is used to create an empty SQL Server database that is automatically cleaned up after testing. … View on GitHub Though not much has changed, here are the most notable differences compared to the Umbraco 16 version Database initialization The SqlServerDatabase resource no longer creates a second database inside the SqlServer test container. While Umbraco 16 would happily create a new database on boot if it didn't exist yet, Umbraco 17 does not and will throw connection errors. For your regular use of Umbraco, this change makes no significant difference. If you also use EF Core, you may need to pay some extra attention here! A base URL for integration tests The WebsiteFixture will now set a fixed base URL when creating a backoffice httpclient. If you need to use a different domain, this base URL can be adapted, but what is important is that the URL uses https protocol. Compared to Umbraco 16, Umbraco 17 requires https to backoffice endpoints by default and requests using http are rejected by default. That's at least what the error would indicate. If you want to see all the changes, you can check out this commit: https://github.com/D-Inventor/automated-testing-in-umbraco/commit/573ef96a155c390ba3d4383bf555f9ff5723b3b4 An additional note I have given some attention to the example website under test in this repository. The homepage at least has a slightly more fancy template, but it's all static content. I haven't yet taken the time to really tie it all together, and I wanted to do so using Test Driven Development, which is the main focus of this example repository. I noticed that the version of playwright for C# doesn't actually let you compare screenshots!? This was a mild surprise and disappointment, because that means I can't actually use snapshot testing to ensure my template doesn't accidentally change when I implement the logic. The Javascript version of playwright does seem to support it, so I guess for better end-to-end testing, we'd need to create an equivalent management API client and scenario builder. Oof! That's all that's all I wanted to share! Hope you check out the repository, give it a star and let me know if the testing examples have been helpful to you or not! Thank you for reading 😊

by Dennis Heutinck

Battle scarred developer's guide to Umbraco v17 - Sections

All the code for this series of posts is available in the DoStuffWithUmbraco Repository on GitHub 1. Sections (see DoStuffWithUmbracoRepo : Sections) A section in umbraco is something accessed from the top bar navigation menu. Its quite simple to add a new section - all you need is the manifest. const sectionManifest: UmbExtensionManifest = { type: "section", alias: DOSTUFF_SECTION_ALIAS, name: "DoStuff Section", weight: 10, meta: { label: "#doStuff_sectionName", pathname: "do-stuff", }, }; Constants Here we have used a constant for the alias, because its often true you will need to reference the section alias in other places on your site. The alias is defined in another file. export const DOSTUFF_SECTION_ALIAS = "DoStuff.Section"; and this replaces the string value in the manifest. Localization You might also notice that the label value starts with a '#', this tells umbraco that we want to use a localize value for the label. we will cover them a bit later, but for now just to so you know you can just put a string in for the label value if you want 2. Dashboard (see DoStuffWithUmbraco repo : Dashboards) At this point your section is quite empty, but you can add a dashboard quite easily to get some content in there. Dashboards are pages that sit at the top level of a section, almost all the sections in umbraco already have dashboards (Content has news, and redirect, settings has, examine, health checks and profiling to name a few). you can add your own dashboard to your own sections or existing sections as you choose. const dashboardManifest: UmbExtensionManifest = { type: "dashboard", alias: "DoStuff.Dashboard", name: "DoStuff Dashboard", js: () => import("./dashboard.element.js"), meta: { label: "#DoStuff_DashboardName", pathname: "do-stuff-dashboard", }, conditions: [ { alias: "Umb.Condition.SectionAlias", match: DOSTUFF_SECTION_ALIAS, }, ], }; Here we define the alias and element we want to use for our dashboard, and the condition determines where it lives. there are all sorts of conditions in umbraco, but here we are saying if the section alias is that of our custom section then we are happy. If we didn't have a condition the dashboard would appear in all sections Again note the use of a constant for the section alias_ Dashboards are WebComponents, they are probibly the simplest ones in umbraco you don't have to inherit anything (if you don't want to) - there are no contexts, or stores or tree's required, you element can just render some HTML. @customElement("do-stuff-dashboard-element") export class DoStuffDashboardElement extends UmbLitElement { override render() { return html`<umb-body-layout .headline=${this.localize.term("doStuff_dashboardTitle")} > <uui-box> <umb-localize key="doStuff_dashboardIntro"></umb-localize> </uui-box> </umb-body-layout>`; } } export default DoStuffDashboardElement; Note : We do inherit from UmbLitElement as opposed to LitElement, this gives you access to the localization helpers amongst other things, so it's worth doing, even though you don't have to. 3. Sidebar App. You have probibly notices that almost all existing sections in umbraco have some form of menu or tree down the left hand side. In Umbraco speak this is a "SidebarApp" and it can contain almost anything! - but usually its menu items and trees. A sidebar is registered in a manifest file. const sidebarManifest: UmbExtensionManifest = { type: "sectionSidebarApp", kind: "menu", alias: "DoStuff.SectionSidebarApp", name: "DoStuff Section Sidebar App", meta: { label: "#doStuff_sidebarStaticAppName", menu: "DoStuff.Static.Menu", }, conditions: [ { alias: "Umb.Condition.SectionAlias", match: DOSTUFF_SECTION_ALIAS, }, ], }; On its own a sidebar app is quite empty. So we need to add some menus and items. 4. Menus Within a standard sidebar you can have a number of 'menus' these are the sections you see in the settings section, "Structure", "Templating" and "Advanced" are Menus to add your own, we have a manifest. const menuManifest: UmbExtensionManifest = { type: "menu", alias: "DoStuff.Static.Menu", name: "DoStuff Static Menu", }; but with out any menu items you won't see much , so lets add a menu item. const timeItemManifest: UmbExtensionManifest = { type: "menuItem", alias: "DoStuff.TimeItem", name: "DoStuff Time Item", weight: 10, meta: { label: "#doStuff_timeItemName", icon: "icon-time", entityType: DOSTUFF_TIME_ITEM_ALIAS, menus: ["DoStuff.Static.Menu"], }, }; You can see how we assign the menu item to the menu, and the menu is actually assigned in the section definition. Don't worry to much about the entityType just yet, its going to get funky when we talk about workspaces. but for now lets just bask in the menu glory. All the client code in this article is available in the DoStuffWithUmbraco Client repo

by Kevin Jump

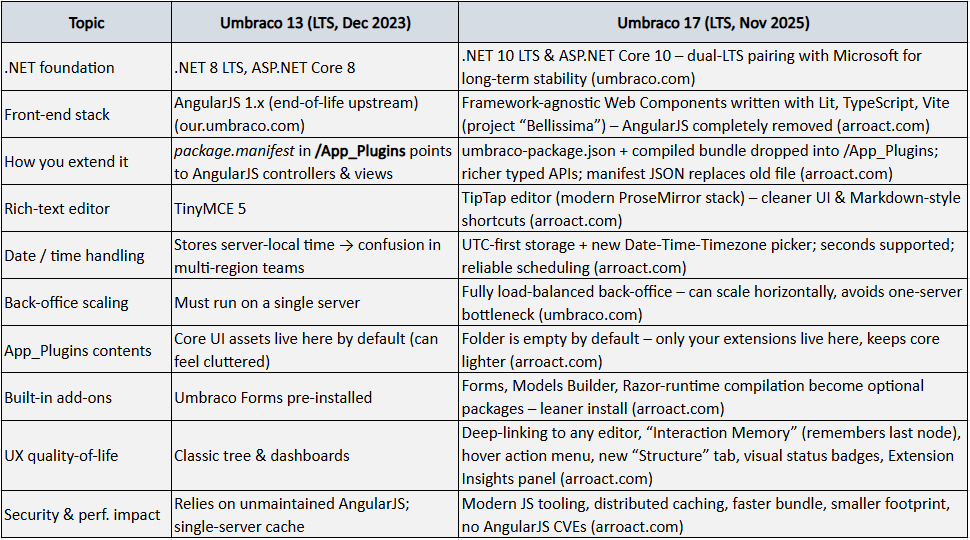
Battle scarred developer's guide to Umbraco v17 - Entry Points

All the code for this series of posts is available in the DoStuffWithUmbraco Repository on GitHub So now that bundles have replaced entry points as the place to integrate your Umbraco extension, do we still need entry points? Yes, i most cases you will still need an entry point, to initialize things like the authentication for your client to talk to the server. or if you are feeling really mischievous to unload other entries from the umbraco registry ! Register your entry point via a manifest. all the extension template will do this one for you, but to show the process export const manifests: Array<UmbExtensionManifest> = [ { name: "Do Stuff Client Entrypoint", alias: "DoStuff.Client.Entrypoint", type: "backofficeEntryPoint", js: () => import("./entrypoint.js"), }, ]; this is then imported and registered via your bundle.manifest.ts file. Auth. The examples that you get with the templates contain most of the code you will need here for authentication. _host.consumeContext(UMB_AUTH_CONTEXT, async (authContext) => { // Get the token info from Umbraco const config = authContext?.getOpenApiConfiguration(); client.setConfig({ auth: config?.token ?? undefined, baseUrl: config?.base ?? "", credentials: config?.credentials ?? "same-origin", }); }); }; As we've said in another post we like to add a bit - which keeps the token fresh for each request. // client interceptor will get the latest token for the auth // context for a request, so if the token has been refreshed // since we first got it, we'll still have a valid token. client.interceptors.request.use(async (request, _options) => { const token = await authContext?.getLatestToken(); request.headers.set("Authorization", `Bearer ${token}`); return request; }); honesty - i am not 100% sure this extra bit is in fact needed - it's something we might revisit. Unregistering things! So your onInit method runs when your extension is loaded, and you can if you want start to manipulate Umbraco's register, you could for example remove the welcome dashboard this way. extensionRegistry.unregister('Umb.Dashboard.UmbracoNews'); Be carefull! removing things from the register might well make bits of the umbraco backoffice unstable.

by Kevin Jump

Battle scarred developer's guide to Umbraco v17 - Bundles

All the code for this series of posts is available in the DoStuffWithUmbraco Repository on GitHub With the Early adopters guide we talked about Entry points as the start of your front end code journey, but now with a few tweaks since v14 bundles are where it's at. What's a bundle. A bundle is an extension point in Umbraco's Backoffice that lets you load JavaScript files and register manifests inside Umbraco's system so your code is loaded as part of the Backoffice. Put simply it's the loader of your extension. typically your entry point javascript file will only import manifest from around your project and return them for umbraco to ingest. export const manifests: Array<UmbExtensionManifest> = [ ...entrypoints, ...sectionManifests, ...dashboardManifests, ...localizationManifests, ...menuManifests, ...workspaceManifests, ...editorManifests, ...modalManifests, ]; As your project grows so will this list, to keep it simple and organised i would recommend that at each level you have manifest that might also import from child folders, before finally having everything brought into the bundle file. For example in the DoStuffWithUmbraco repository. we might have a /workspaces/views/manfiest.ts file, that is then imported into the /workspace/manifest.ts file which is the one we import into our bundle file. +-- src - bundle.manifest.ts +-- workspaces - manifest.ts +-- views - manifest.ts This means everything needed for the workspace is in /workspace/manifest.ts and we can if need be move it about knowing it's all there. It also means any one manifest definition file doesn't contain two much information. What about manifests in umbraco-package.json There is quite a bit in the umbraco docs about how you can define your manifests inside the umbraco-package.json file, and you can, but once you go beyond something very very basic (e.g. not just adding localization). you will want to do it via a bundle. Adding all the manifests via the bundle gives you better typescript & checking support in your project, its neater and it catches the errors quicker. Adding via the umbraco-package.json also requires that the site be restarted for the packages to be loaded (these files are read in by the Backoffice code on start-up). using a bundle as the entry point you can add new things build the scripts and it all appears.

by Kevin Jump